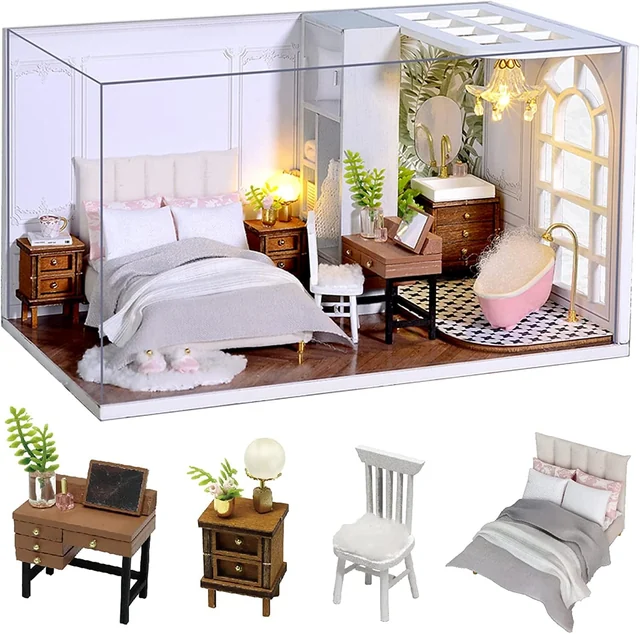
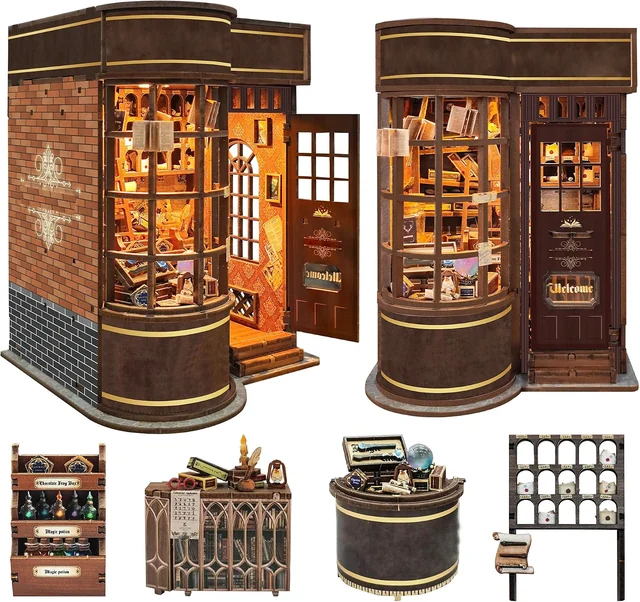
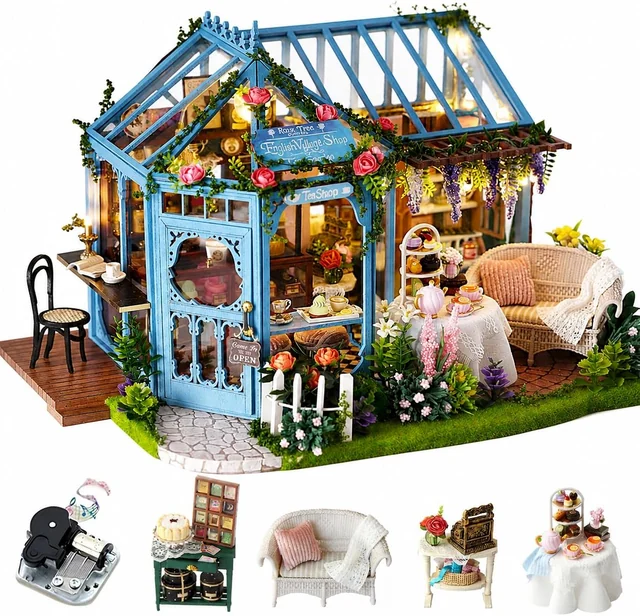
Choose a miniature kit by the work you want to do and the place where it will live. A beautiful finished room is only half the decision. The right first project also fits your available time, your tolerance for tiny details, and the tools you are comfortable using.
CUTEROOM offers several ways into miniature making, from narrow scenes for a bookshelf to rooms and larger house displays. Start with the shape of the project, then compare its actual instructions, contents and finished measurements. A picture can show you the atmosphere you love; the practical details tell you whether you will enjoy creating it.
Start with the finished space
Before comparing themes, choose a possible home for the completed model. This simple step prevents a common disappointment: finishing a scene that is too deep for the shelf you had in mind. Measure usable shelf depth, clear height and available width. Account for a raised lip, a cabinet door, the space behind books and anything projecting from the miniature's base.
Make a paper footprint in the listed dimensions and place it where the model would stand. If you are considering a cover, use the cover's outside measurements for this exercise. A cardboard rectangle standing upright can help you judge height without buying anything. Walk past the proposed location, sit in your usual chair and check whether you would actually see the scene.
Book nooks reward a view into a narrow opening. An open room generally invites you to look across its furniture and smaller arrangements. A house can offer more than one viewing angle, depending on its design. Neither format is automatically better. The useful question is whether the shape matches the space and the way you will encounter it each day.
Consider practical access as well. You may need to reach a switch, replace batteries, lift a dust cover or occasionally move the model for cleaning. A perfect visual fit that traps the controls will become inconvenient. Our miniature display guide explains how to plan these clearances before the final shelf arrangement.
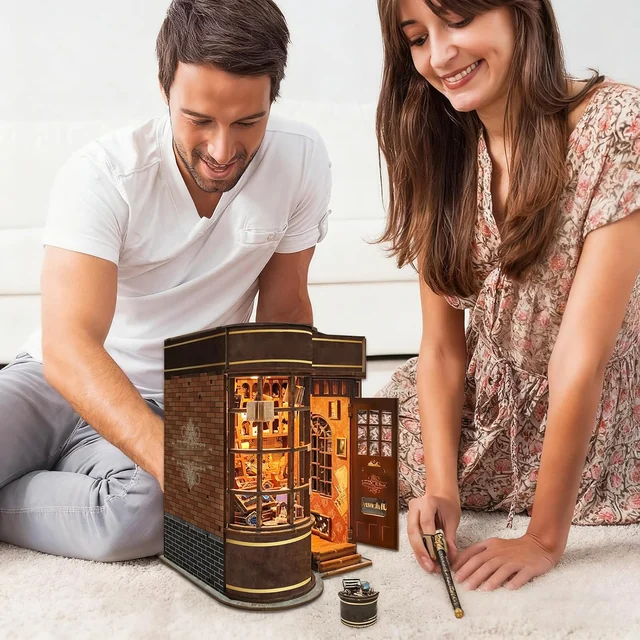
Compare book nooks, mini rooms and dollhouses
Format names describe a broad style of display, not a standardized level of difficulty. Two kits in the same category can require quite different amounts of cutting, fitting, folding and gluing. Use the categories to narrow the shape you like, then read the individual model information to understand the work.
| Format | What to consider | A useful first check |
|---|---|---|
| Book nook | A scene framed by a narrow opening, often intended for a bookshelf | Check depth, opening height and access to any controls |
| Mini room | A focused interior or shop scene with small furniture and accessories | Look closely at the size and number of handmade details |
| Dollhouse display | A broader architectural composition that may occupy more space | Measure the complete footprint and decide which sides need to remain visible |
Explore CUTEROOM book nooks if a glimpse between books is the effect you want. Browse miniature rooms when the furniture, color palette or interior arrangement is your main attraction. Consider dollhouse kits when you want a larger architectural project and have room to display the whole composition.
A small footprint does not necessarily mean simple construction. A narrow scene can contain many tiny assemblies, while a larger panel may be straightforward to fit. Judge the work from close photographs, instruction examples and the materials involved. Do not choose solely by package size or by the number of pieces printed in a title.
Also distinguish a collectible craft model from a play dollhouse. Delicate glued accessories, exposed wiring and small decorative parts need appropriate handling. Follow the model's age guidance and warnings, and choose a finished display location suited to the people and pets in your home.
Choose the making process you enjoy
Think about other activities you already like. If you enjoy paper crafts, folding tiny packaging or trimming printed details may be part of the appeal. If you prefer puzzles, fitting larger labeled parts may be more satisfying. If arranging a room is what excites you, look for a scene with furnishings you would enjoy positioning and viewing after assembly.
Study photographs for clues, but avoid assuming that every object arrives fully formed. A cushion might need folding, a plant might require several parts, or a book might be made from a printed wrapper. The instructions and contents list should settle these questions. When they do not, ask about the specific part or step before choosing.
Divide your preferences into tasks you welcome, tasks you can learn and tasks you would rather avoid. For example, you might welcome repetitive paper work, be willing to learn basic fitting, and prefer not to start with a kit that demands extensive electrical assembly. That description is more helpful than calling yourself simply a beginner.
There is no need to select the most complex project to make the hobby worthwhile. A compact scene can give you enough opportunities to practice neat joins, careful alignment and patient sequencing. An enjoyable first build leaves you with a clear idea of what you want from the next one.
Comfort matters too. Consider whether you can see the smallest details under your normal work light and whether you can handle them with your preferred tools. A magnifier or a better lamp may help, but a kit whose smallest tasks you actively dislike is unlikely to become more appealing once the package is open.
Read a product page beyond the hero photograph
Begin with the exact model name and variant. Similar photographs can make related versions look interchangeable even when their contents or dimensions differ. Keep the chosen name beside your notes so that a review, instruction image or accessory recommendation does not quietly become information about a different kit.
Next, look for the finished dimensions, required assembly, stated materials, lighting details and included accessories. Treat each field separately. A photograph showing a cover does not by itself establish that the cover is included. Likewise, a lit photograph does not tell you the battery type, whether batteries are supplied, or how the switch operates.
Use the full gallery rather than one dramatic angle. A front view explains the composition; a side view may reveal its depth; a detail view shows the kind of small objects involved. If a dimension diagram is available, compare it with the written measurements. Resolve any mismatch before relying on the number for a tight shelf fit.
Look for the difference between the finished model and the contents of the box. Decorative props surrounding a photographed scene may belong to the photography. Tools visible beside a kit may be recommendations. Keep a short list of what is expressly included and a separate list of what you need to provide.
Finally, read the assembly information with your actual circumstances in mind. A kit that looks ideal on a permanent craft table may be less convenient if you must clear a dining table every evening. That does not rule it out, but it makes a movable project tray and secure parts storage part of the plan.
Treat difficulty and build time as planning information
A stated completion time is best used as a rough reference. Your pace depends on familiarity, breaks, organization, corrections and the amount of time spent customizing. Glue may need to set between steps, and that waiting period is not the same as time spent actively building. A project can therefore occupy several evenings even when the hands-on work is shorter.
Difficulty is similarly personal. One maker may find repetitive small parts relaxing but dislike interpreting a diagram. Another may understand the structure immediately and find fine paper work tiring. Ask which kind of difficulty the kit contains rather than trying to compare every model on a single easy-to-hard scale.
For a first project, favor clear instructions and a manageable number of unfamiliar techniques. You can still choose an appealing theme. The aim is to avoid stacking every new challenge into one build: very small pieces, elaborate wiring, tight deadlines and extensive repainting at the same time.
Plan the project in sessions with distinct stopping points. Inventory and preparation can be one session; several small furnishings can be another. Leave enough time at the end of each session to store loose pieces and note the next instruction. This makes restarting easier than trying to remember where you stopped from a half-built object alone.
If the model is intended for a gift date, include time for missing-part questions, corrections, drying and packing. Choose a project you can complete without treating every evening as a deadline. The recipient will see the finished scene, not the advertised assembly estimate you tried to meet.
Budget for the whole project
The kit price is only one part of a first build. Compare what you already own with the tools and supplies the instructions require. You may need suitable glue, scissors, tweezers, a cutting surface or batteries. Check the exact model before buying these items; assumptions based on a different kit can leave you with unnecessary supplies.
Start with a small, useful set of tools rather than a large specialist collection. A comfortable pair of tweezers and a clear work light can be more valuable than several tools with overlapping jobs. If a cutting tool is required, use one you can handle safely and follow its instructions. Keep the work surface protected and the blade away from your supporting hand.
Include display costs only if you intend to incur them. A cover, a dedicated shelf or a new cabinet can change the total considerably. You do not need to buy all of these before your first project, but you should know whether the finished scene will require a solution you have not budgeted for.
Keep consumable purchases proportionate. A large container of adhesive is not automatically better value if you will use very little and it becomes difficult to dispense neatly. The important criteria are material compatibility, suitable working time and a way to apply the required amount accurately.
Compare complete project totals when choosing between two kits. A slightly more expensive kit that fits your existing tools and display space may be the simpler purchase. Conversely, a less expensive model can be a good first choice when it gives you the particular kind of making you want without additional equipment.
Understand materials before choosing glue
Miniature scenes may combine materials that behave differently. Paper can absorb moisture, thin wood can split if forced, and transparent parts can show marks that remain hidden on an opaque surface. The best adhesive choice is the one recommended for the relevant materials and step, rather than one product used automatically everywhere.
Read the adhesive label as well as the kit instructions. Working time, handling time and full drying or curing time are not interchangeable. As one manufacturer example, Aleene's guidance for Original Tacky Glue notes that drying varies with the amount applied and local temperature and humidity. That principle is useful when planning a session; it is not a recommendation to substitute that glue into every CUTEROOM step.
A trial on a suitable offcut can answer practical questions before you touch a visible surface. Does the adhesive stain the printed finish? Does it allow enough time to align the parts? Does the join hold after the specified wait? Test only on expendable material and avoid using structural pieces as experiments.
Be cautious about choosing a fast-setting adhesive simply to save time. A shorter adjustment window can make small alignment errors harder to correct. Follow ventilation and handling directions on the actual product, and keep adhesives closed when they are not in use. More specialized chemistry is rarely the first answer to an ordinary planning problem.
If you want a closer look at preparation, our first miniature build guide covers parts sorting, dry fitting and orderly assembly. The model's supplied instructions remain the authority for its sequence and connections.
Match the theme to the details you will notice
The strongest reason to choose a theme is often a particular detail. You might love a row of tiny books, a window framed by plants, a miniature table setting or the way a passage seems to lead beyond the opening. Identify that detail. It will help you distinguish genuine preference from a photograph that is simply beautifully lit.
Then look at the rest of the scene. Does the color palette suit the shelf or room where you plan to display it? Will the front face remain visible beside your books? Are the objects you love near the opening or deeper inside? A model you can appreciate from your normal viewing position will be easier to enjoy every day.
Think about daytime appearance as well as illuminated photographs. If lighting is included, it can create a different mood, but the model will also spend time switched off. Choose a scene whose shape and colors appeal to you in ordinary room light. That avoids making the entire display dependent on an electrical feature.
Compare a few named scenes to make those preferences concrete. CUTEROOM Study Room, Coffee Shop and Candy Shop offer different subjects within the mini room collection. Look at the visible furniture and accessories in each gallery and choose the objects you would enjoy making. For a bookshelf, compare Magic House with Bear Bakery. Their different storefront themes give you a useful starting point without assuming their construction or electrical details are identical.
For a collection, you can create coherence without choosing identical themes. Similar heights, a shared color or a consistent base arrangement can connect different models. Alternatively, leave space around each scene so its individual atmosphere remains distinct. You do not need to decide the future of an entire collection before buying one kit.
Choose a kit as a gift
A kit gives the recipient a making project, so consider whether they want the activity as well as the finished object. Someone who admires miniatures may prefer a completed display. Someone who enjoys crafts may care much more about the assembly process. If you are unsure, a brief conversation about their hobbies is more useful than guessing from their decorating style.
Choose around an existing interest: reading, interiors, architecture, small gardens or detailed handwork. Then check their available workspace and the model's stated age suitability. Adult collectors and older hobbyists can have very different preferences for small components, instruction styles and the amount of time they want to commit.
Include required supplies only after checking the contents. If you add glue, keep it in its original packaging so the recipient has the manufacturer's directions. If batteries are required, match the exact specification rather than choosing from a photograph. Avoid opening and mixing the labeled parts to make a decorative gift arrangement.
A useful accompanying note can be simple: why you chose the scene and where you imagined they might display it. Avoid promising that it takes only one evening or that anyone can assemble it effortlessly. Let the recipient set their own pace and decide whether to follow the pictured arrangement or add personal touches.
If you are giving a finished miniature, consider transport at the selection stage. A scene with an accessible solid base is easier to support than one you would be tempted to lift by a roof or decorative frame. Keep the instructions and spare components with it, and explain any switch or battery access clearly.
Compare two finalists fairly
Once you have narrowed the choice, put the practical information side by side. Avoid comparing one kit's complete contents with another kit's promotional headline. Use the same questions for both and leave an unanswered field as something to check, rather than filling it with an assumption.
| Question | What to record | Why it helps |
|---|---|---|
| Will it fit? | Finished size, cover size if relevant, and access space | Prevents a display problem after completion |
| Will I enjoy making it? | Small-part work, paper tasks and unfamiliar techniques | Matches the project to your preferred activity |
| What else is needed? | Required tools, adhesive, power supplies and storage | Makes the total commitment visible |
| What attracts me? | One or two specific details in the actual scene | Keeps the choice grounded in your taste |
| When will I work on it? | Available sessions and a practical place to pause | Reduces pressure to rush the build |
Give extra weight to the constraint you cannot easily change. If your shelf is shallow, depth may decide the choice. If you have limited uninterrupted time, easy storage between sessions may matter more than piece count. If you dislike making tiny paper objects, a favorite color palette may not compensate for hours of that work.
Do not turn the worksheet into a competition with an artificial winner. Two kits can both be suitable for different reasons. The point is to make the tradeoff visible so you can choose deliberately, rather than discovering it after opening the box.
Plan your first evening before ordering
Imagine the first hour with the package open. You need room for the instructions, the parts being used and a safe place for everything else. A clear, stable table is more helpful than a crowded corner with a dramatic lamp. If the table is shared, decide how you will move the project without disturbing a wet assembly.
A shallow tray can hold a small work area, but check that it supports the entire base of anything you move. Use separate labeled containers for loose parts and keep the original part identifiers until their role is clear. Avoid combining similar pieces merely because they appear to match; small differences may matter later.
Set a modest first-session objective. Read the instructions, compare the contents with the inventory and identify the first assembly. You may complete a small component as well, but you do not need a recognizable room by the end of the evening. A careful start can prevent much more time-consuming confusion later.
Keep the packaging until the contents are checked and the project is complete. Before discarding a bag or sheet, look for small attached pieces and printed identifiers. If something seems absent or damaged, photograph it and use the purchase account's available order-help options. Our assembly help page explains what information to have ready.
Questions before you choose
Should a beginner start with a book nook?
A book nook can be a good first project if its actual assembly tasks suit you. Its narrow shape alone does not establish difficulty. Compare the instructions, smallest components and required techniques just as you would for an open room. Choose the format for the display you want, then choose the model for the work you want to do.
Is a higher piece count better value?
Piece count describes quantity, not the quality of your experience. Many similar pieces may mean enjoyable repetition or a task you find tiring. A lower-count scene may still have careful alignment and finishing work. Judge value by the combination of subject, materials, construction, included contents and the time you want to spend.
Can I change colors and details?
Customization can be enjoyable, but plan changes before covering printed surfaces or assembling inaccessible areas. Check material compatibility and fit first. For an initial build, one reversible arrangement change may be easier to manage than repainting everything. Keep essential structural parts, wiring paths and access points consistent with the supplied instructions.
What should decide the final choice?
Choose the scene whose details you want to look at, whose tasks you are willing to do, and whose finished size fits a real place in your home. With those three questions answered, you can browse the CUTEROOM collections with a clear purpose and begin your project with fewer surprises.